The winters can be are long here in northern Wisconsin. Courses are closed by the third weekend in October and will not open until April. Those of us who want to improve our games the quickest must move our practice indoors.
I’ve already written about my visit to Inside Edge Golf. What an awesome facility. Unfortunately I live almost a four hour drive from Inside Edge in the Twin Cities area.
We currently utilize Premier Sports Academy just outside Wausau, WI for access to a golf simulator. They are primarily an indoor baseball facility, with some soccer and golf. They have a very nice room with an aboutGolf simulator, the same simulators that can be found at Inside Edge Golf.
The golf at Premier Sports Academy is in it’s own room, completely separated from any other activities there. I love that, especially for instruction. My son is getting instruction there over the winter, gearing up for freshman high school golf in the spring.
I could also get used to being in a more open environment, such as in your own stall at Inside Edge Golf. That setup does have its advantages, such as when playing in a league, which would be much more social at a bigger, more open facility.
My son and I play 18 holes on the simulator after his instruction. Playing on a simulator is great but it is not a replacement for the real thing. If our winters were 40 degree Fahrenheit weather so our courses could remain open, I’d be at the course practicing and playing, never once going to the simulator. Simulators are fantastic for full swing, even half and three quarter swing work, but the realism drops off dramatically for pitching, chipping and putting. Here’s the number one problem with simulators. It’s the same problem that the practice range presents you. A golf simulator serves up a perfect lie on every shot. There is just no simulation for real ground on a real course. You can simulate wind on a simulator, it’s just difficult to simulate rough and angled lies. You should be scoring lower on a simulator, just for this reason.
So before a few places in Wausau figured out how to make simulators financially viable for them, it would have been a 3 hour drive for us to get simulator time. Even the hour and a half drive we do now could not be possible for some of you. I get that.
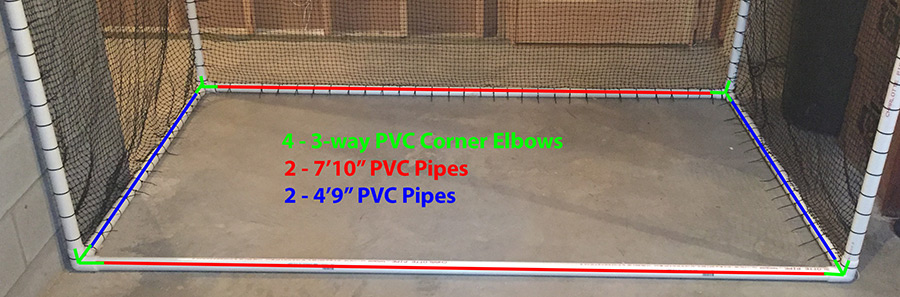
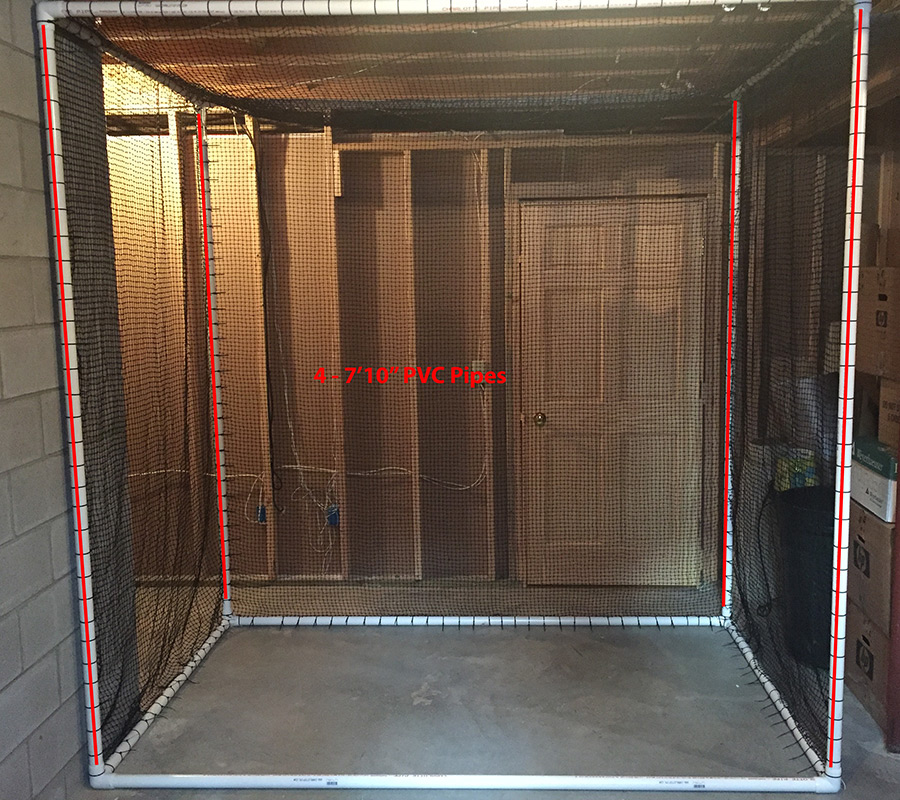
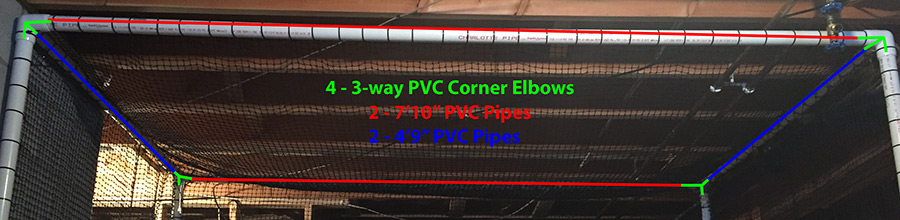
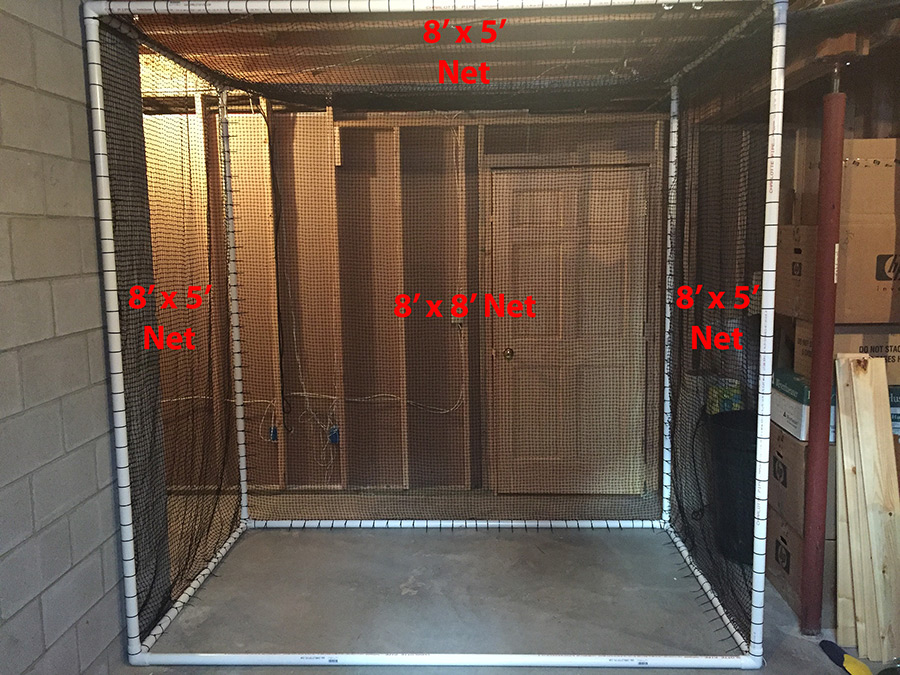
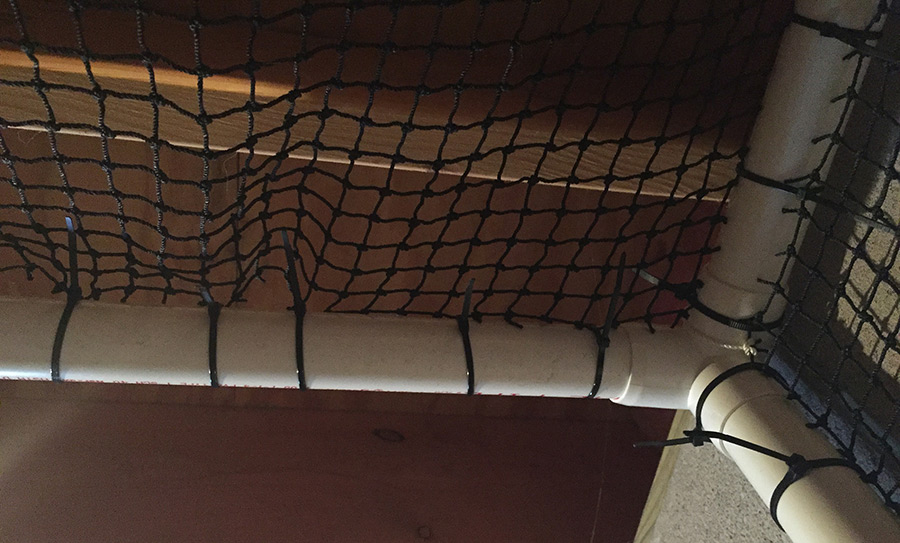
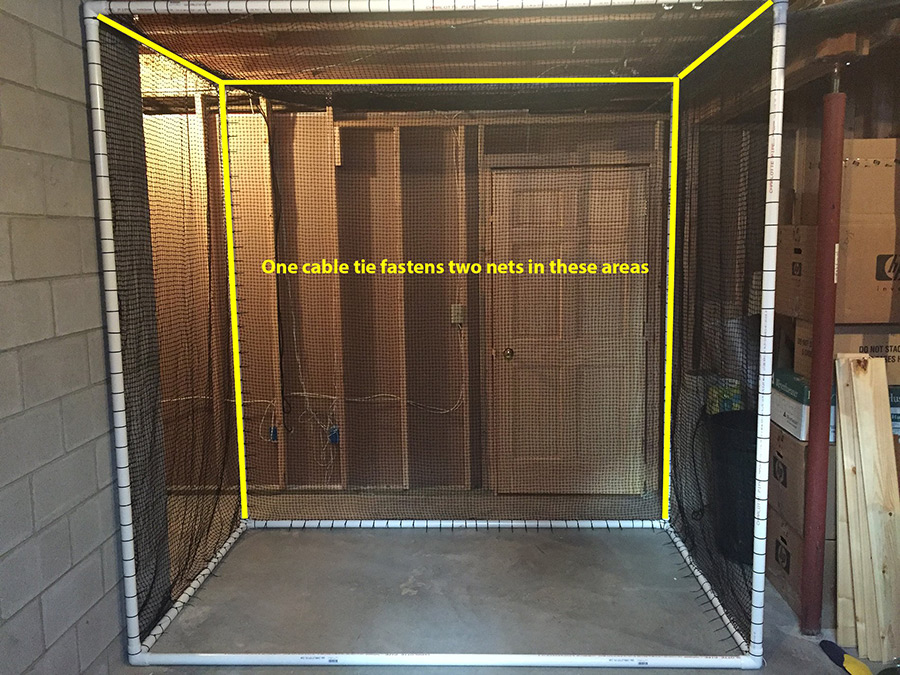
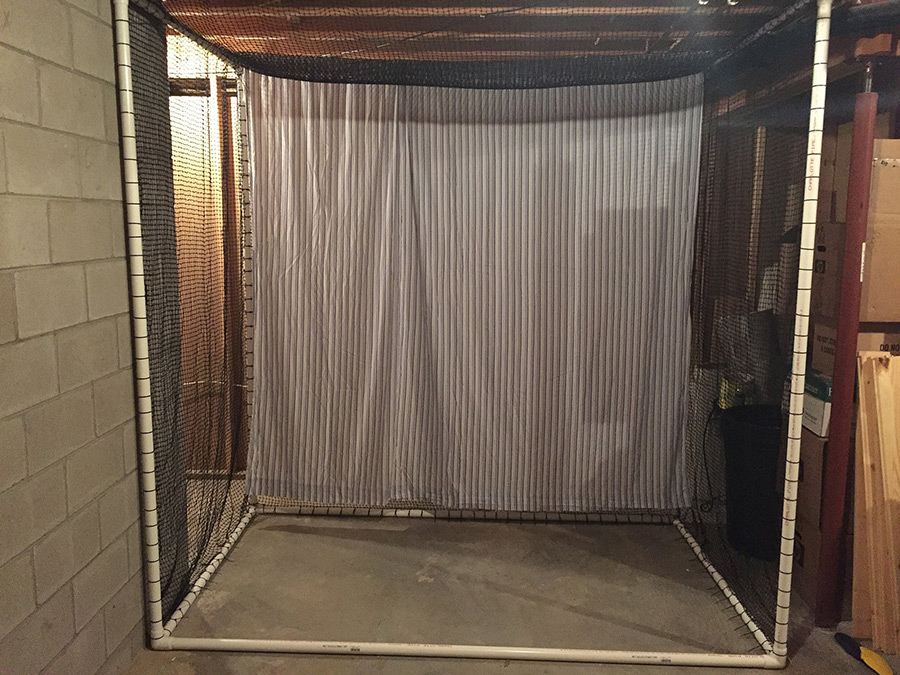
The next best option is to build your own indoor golf net.
Ideally, you would have a spot for the net in your basement or in a heated garage or shed. Our net is in the unfinished side of our basement. Those without a spot in their house could look nearby for possibilities. I know I could get access to the gym in our community center. The indoor golf net we have built is not easily portable although I wonder if I could leave the net there and allow others to use it.
Of course, rarely is any solution perfect. Our basement height only allows us to swing irons. There is not enough clearance for us to swing drivers. An inconvenience for sure, but definitely not a deal breaker. Most swing concepts are the same for irons and drivers, and we just work on driver a bit more when we get back outside.
My point here is that a DIY indoor golf net is an option for many of us.
It is important to practice your full swing year round. It is also more important to practice your short game and putting year round, and in an upcoming post we’ll look into easy ways to do that.